3D Studio Max Course Content

We at Aonlinetraining offer interactive online courses (e-learning) for Autodesk 3Ds Max (3D Animation Courses).
Online training courses for AutoDesk 3Ds Max covers right from the Basics to the Most Advance features of the software
All the tutorials, lessons for AutoDesk 3Ds Max are supplemented with proper assignments and projects which are monitored by us (Staff Members of Aonlinetraining)
Online training (courses) for AutoDesk 3Ds Max would take a student 100 hours (approx) to Complete.
3D Studio Max Course Content
Phase I
Phase II
Phase III
Phase IV
Phase V
Phase VI
Phase VII
Phase I
- How To Start 3ds Max
- Introduction To 3ds Max
- Viewing And Navigating 3d Space

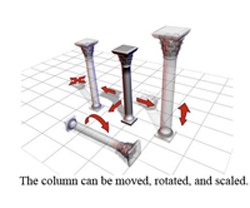
- Transforms-Moving,Rotating, And Scaling Objects
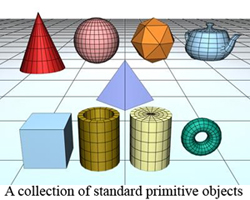
- Creating Geometry Using Standard Primitives
- Box
- Cone
- Sphere
- Cylinder
- Tube
- Torus
- Pyramid
- Teapot
- Plane
- House Exercise(Using Standard Primitives)

- Table Exercise Part-I(Using Standard Primitives)
- Table Exercise Part-II(Using Standard Primitives)

- Creating Geometry Using Extended Primitives
- Hedra
- Torus Knot
- ChamferBox
- ChamferCylinder
- OilTank
- Capsule
- Spindle
- L-Ext
- Gengon
- RingWave
- Hose
- Prism

- Bed Exercise - Creating Geometry Using Extending Primitives
- Hedra
- Torus Knot
- ChamferBox
- ChamferCylinder
- OilTank
- Capsule
- Spindle
- L-Ext
- Gengon
- RingWave
- Hose
- Prism
- Bed Exercise(Using Extended Primitives)

- Understanding Viewport Control
- Final Galaxy Viewlet

Phase II
- http://www.aonlinetraining.com/images/images/galaxy.jpg
- Creating Line Using Spline:

- Creating Rectangle Using Spline:

- Creating Circle Using Spline:

- Creating Ellipse Using Spline:

- Creating Arc Using Spline:

- Creating NGon Using Spline:

- Creating Text Using Spline:

- Creating Helix Using Spline:
- Olympics Exercise:


Phase III
- EditablePoly
- Array


- Extrude from spline


- Hinge from an edge
- Creating Models
- Chair1
- Chair2
- Sofa


- Sofa with pillow

Phase IV
- Modifiers
- Bend
- Bevel
- Cross-Section/li>
- Extrude
- FFD
- Lathe
- Lattice
- Melt

- Mirror
- Noise
- Optimize
- Path deform binding
- Push
- Relax
- Ripple
- Skew
- Slice & caps hole
- Spherify

- Squeeze
- Stretch
- Caper
- Cessellate
- Twist

- Wave
Phase V
- How To Animate An Object

- How To Render An Animation


- Linking 3


- Key Concept Of Omni Light


- Photometric Light Parameters 1

Phase VI
- Camera
- Understanding Camera Parameters


- Understanding Camera Parameters
- Particles Rain


- Snow
- Blizard

- P-Array

- Pf_Source
Phase VII
- Reactor Cloth New


- Metal Effect


- Glass Effect


- Max 1Multisub Materialnew


- Mirror Effect

- Colgate_Tex
- Advanced Effect
- Bump_Cellular_Map
- Final Galaxy Viewlet
- Phase_IXX_Inew

- Phase_IXX_IInew
- Phase_IXX_III.Viewlet


- Lightning Viewlet


- Material_1.Viewlet


- Material_2.Viewlet


